You want to access the internet by using the data of your phone (via mobile hotspot) with a limited mobile data plan (1/1.5 GB daily) on your PC/laptop as you don’t have a Wi-Fi connection (i.e. unlimited data), but the whole data gets exhausted in just a few minutes, right? Here’s the step by step solution to sort the point out.

To resolve the issue, we’ll use a feature of Windows Settings called Metered connection to limit unnecessary data usage.
Metered connection
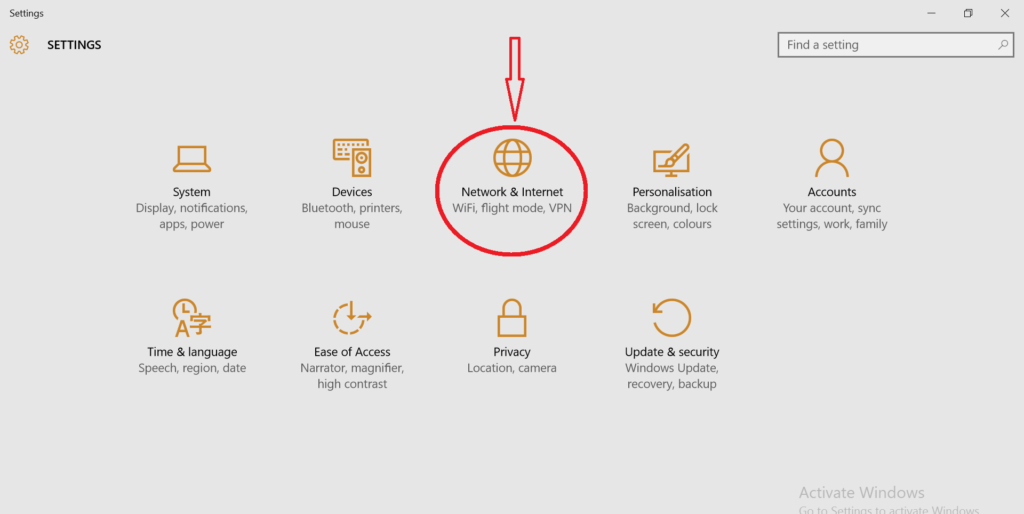
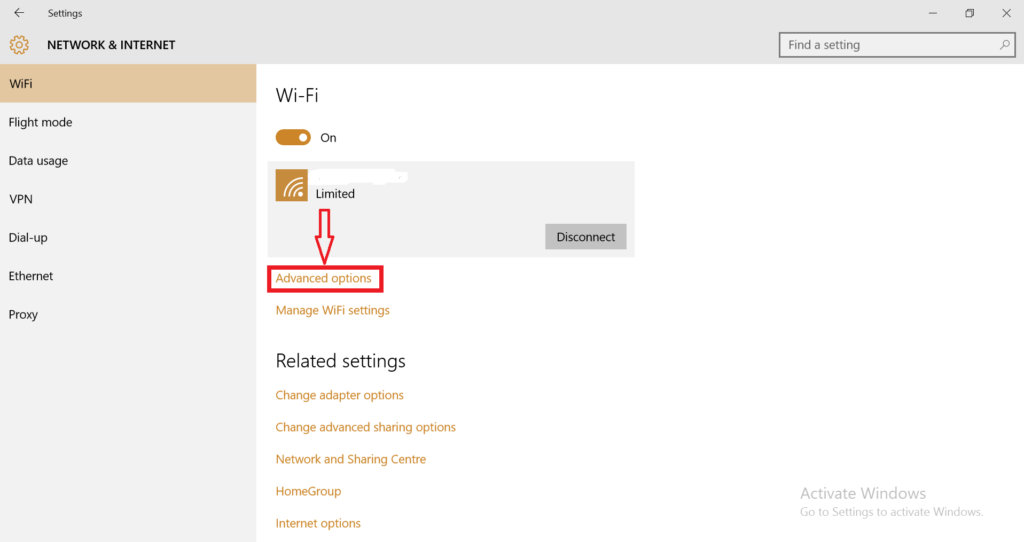
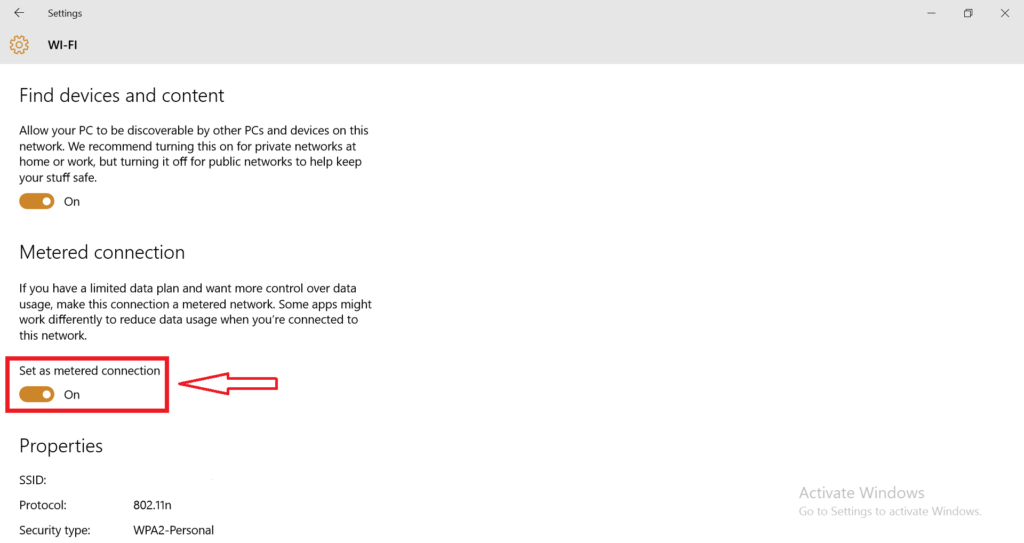
Firstly, turn on your phone’s Hotspot and connect it with the WiFi of your PC. After that, go to Settings. Then, click Network & Internet. After that click WiFi and here you’ll find an option called Advanced options. Click here and now you’ll find an option Set as metered connection under Metered connection. Just turn it on and you are done!
Now your PC will treat the hotspot as a metered connection i.e. a connection that has a limited data plan and will lessen data usage accordingly while connected to it.
The directory you need to follow (after connecting the hotspot with the PC) is as follows
Settings> Network & Internet > WiFi >Advanced options > Set as metered connection (turn it on).
For better understanding, guiding screenshots are given below
Battery Saver
In addition, you can use another method to restrict background data usage. And thus, you will ensure that the data will be being used in the application you have opened only.
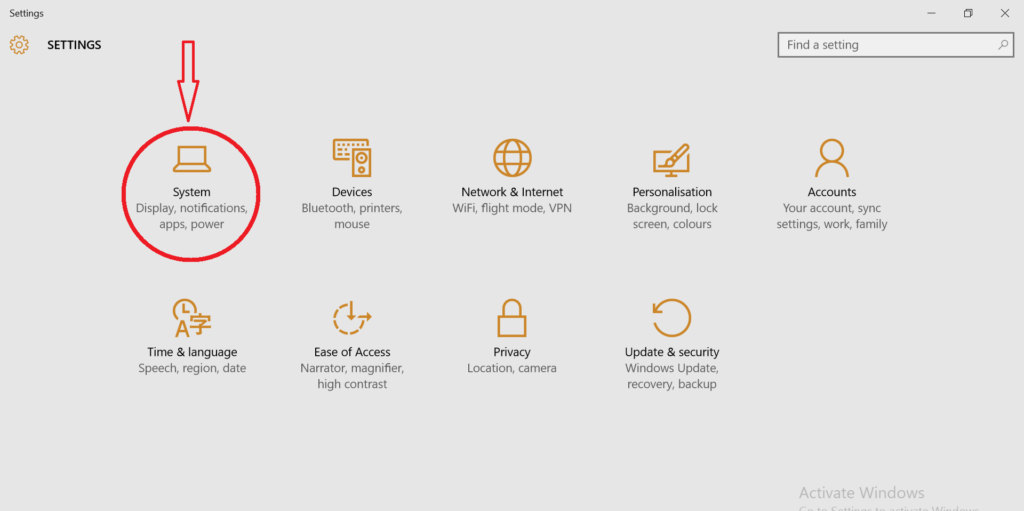
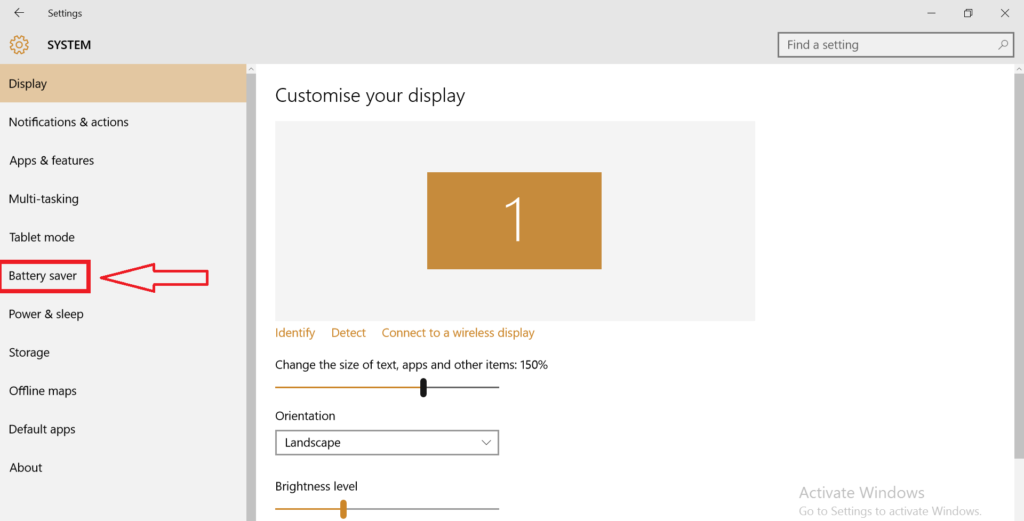
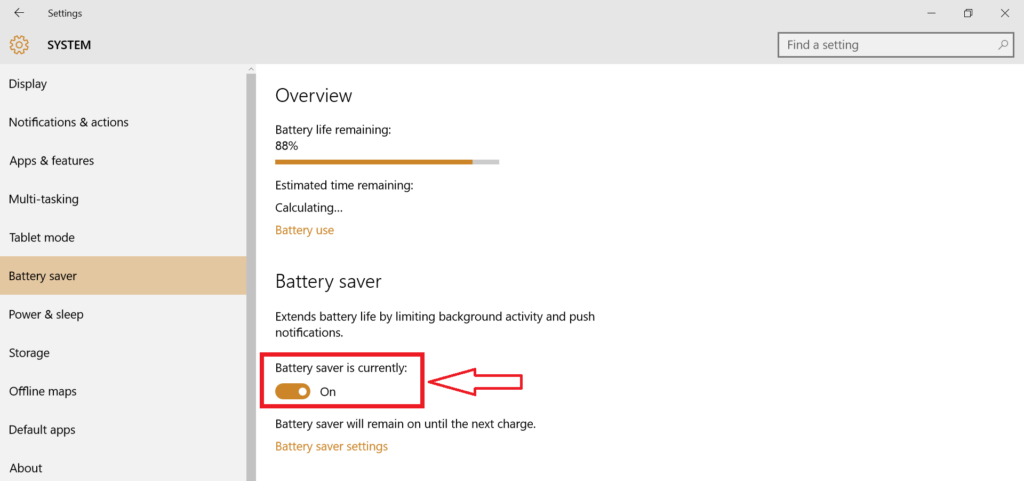
However, you can easily do it just by turning on the Battery Saver. For doing so, first, go to Settings. Then click System and then click Battery Saver and turn it on.
Voila! You are done. Now, you have completely restricted background data usage. Hence, your data usage will be in the foreground only.
The directory should be followed is as follows
Settings >System > Battery saver (turn it on).
However, please note that the tricks are best compatible with Windows 10 and may not be applicable to the other version of Windows.
For your convenience, the guiding screenshots are also given below